Vintage Maintenance: Restoring the Boss CE-3 Part 1
- Mar 31
- 2 min read
The Issue: Analog Instability
For years, the Boss CE-3 chorus was central to my pedalboard. It offered that specific, dimensional shimmer that defines the analog chorus sound. However, like many vintage units, it began to develop issues. It introduced random, unpredictable noise into the signal chain—sometimes a hiss, sometimes a crackle.
In a live environment, reliability is paramount. I couldn't risk the signal integrity of the entire board for one pedal, so I made the difficult decision to pull it from the rig.
The Interim Solution: A Lesson in Signal Flow
To fill the modulation gap, I swapped in my Boss SE-70 (a half-rack multi-effects unit). While the SE-70 provides a pristine, classic digital chorus, I found myself missing the specific character of the CE-3.
However, this limitations forced me to re-evaluate my approach to tone shaping. Instead of browsing Reverb for new gear, I decided to audit the gear I already had. I sat down with a pen and paper to map out the frequency responses and control behaviors of my current setup.
I realized that by carefully adjusting the EQ and gain staging on the SE-70 and my preamp, I could achieve a much higher quality sound than I initially thought. It wasn't about the gear "magic"; it was about understanding how the frequencies stacked up across the signal chain. A simple adjustment on paper often solves more problems than a credit card.
The Diagnosis
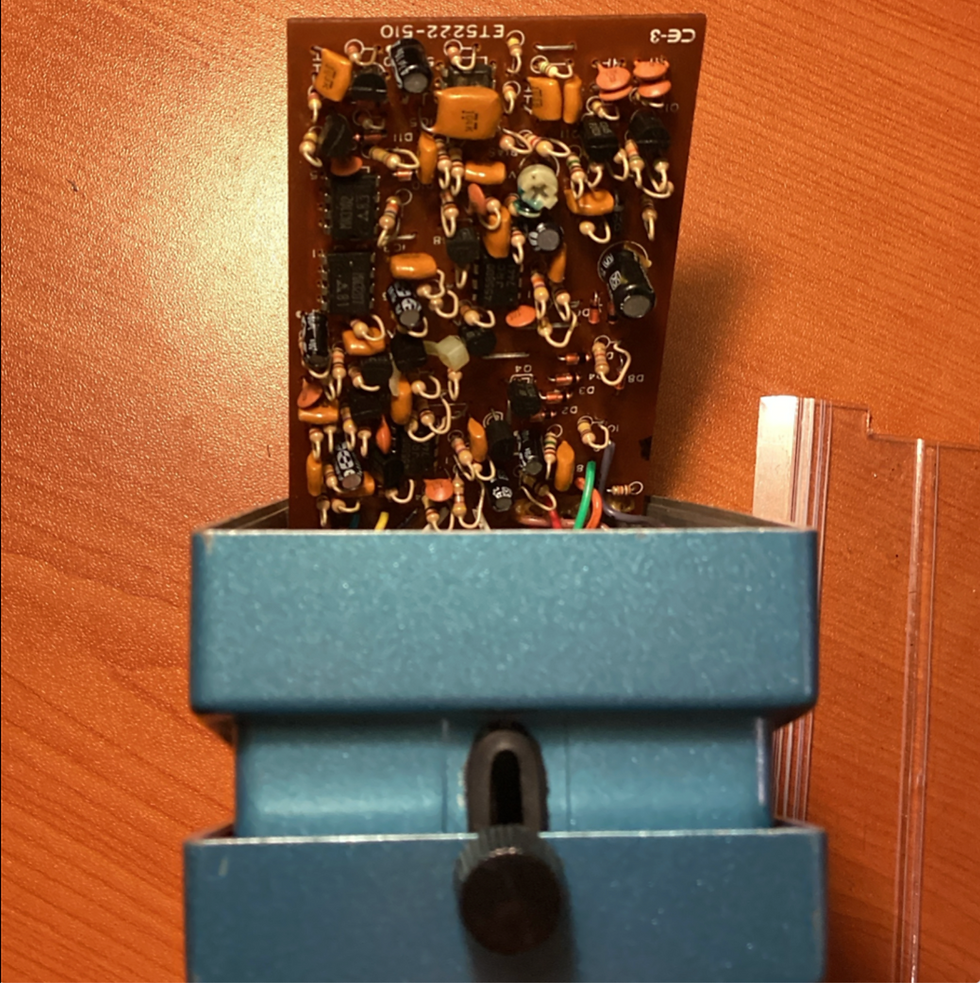
Despite the success with the SE-70, the CE-3 remained on my mind. I decided to open it up and perform a proper inspection.
Upon removing the back plate and the protective plastic shield, the culprit was immediately visible: blue oxidation (rust) accumulation around the internal trimmer potentiometers.
In analog BBD (Bucket Brigade Device) circuits, these trimmers are critical for biasing the delay chips. Corrosion here doesn't just mean a dirty pot; it means the voltage controlling the effect is drifting, leading to the instability and noise I was experiencing.
The Restoration Plan
Mere cleaning isn't enough for a unit of this age if I want it to be road-ready. I have drafted a comprehensive restoration and modification plan:
1. Trimmer Replacement: I will desolder the corroded trim pots and replace them with sealed, high-precision equivalents to ensure stable biasing for the BBD chips.
2. Electrolytic Recapping: Vintage electrolytic capacitors dry out over time, affecting the noise floor and low-end response. I will replace the entire power and signal filtering section with high-grade audio capacitors.
3. ACA to PSA Conversion: The vintage CE-3 was designed for the old unregulated 12V ACA adaptors. On a modern 9V regulated supply (PSA standard), the LED is dim and the headroom is compromised because of an internal limiting resistor. I will modify the power circuit to accept modern standard 9V power correctly.
This isn't just a repair; it’s a restoration of reliability. I look forward to getting this unit back on the board and sharing the sonic results.
To be continued.